
Automation Rules are a powerful feature that allows users to create no-code or low-code triggers and actions. With them, users can define if-this-then-that workflows directly on the UI.
Automation Rules are available in both community and enterprise in all Odoo versions.
What are Automation Rules
These rules monitor system events or timings and automatically run actions when conditions are met.
Examples include:
- Creating an activity when a field updates to a certain value
- Archiving records after a delay since their last update
There are many types of actions you can choose from, including sending emails, sending webhook notifications, etc.
Case examples
Your company is using the app CRM extensively. You would like to automate the CRM app so that, on an Opportunity:
Use Case 1
When reaching the stage X, Odoo should generate a list of stage X activity
Use Case 2
Once all the activities in stage X are marked as Done, Odoo should move the Opportunity to stage Y
Use Case 3
When at stage Z, send an automatic email to the Team Leader of the Sales Team of the Lead.
How do we implement the Automation Rules?
Prerequisites
Install some modules
Go to Apps > search for and install:
- CRM
- Base Automation
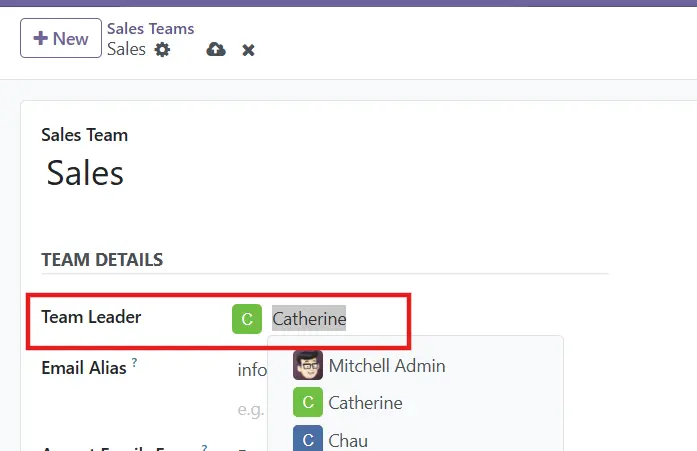
Configure a Sales Team with a Team Leader
In CRM > Configuration > Sales Team, set the Team Leader:
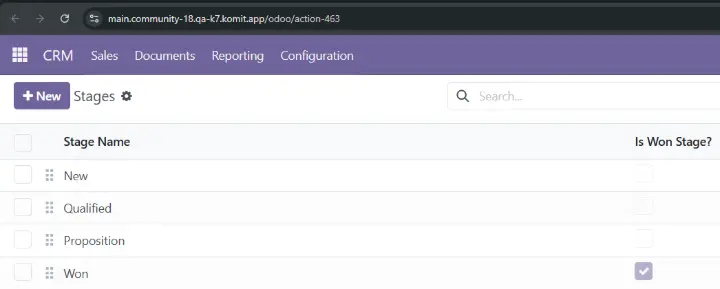
Familiarize yourself with the current stages
Case 1: Configure an Automation Rule to create an Activity
Note: You should create automation rules in the test environment first to test without breaking data.
1. Go to Settings > Technical > Automation > Automation Rules (or Ctrl/Cmnd + K, search 'Automation Rules'). Click on New:
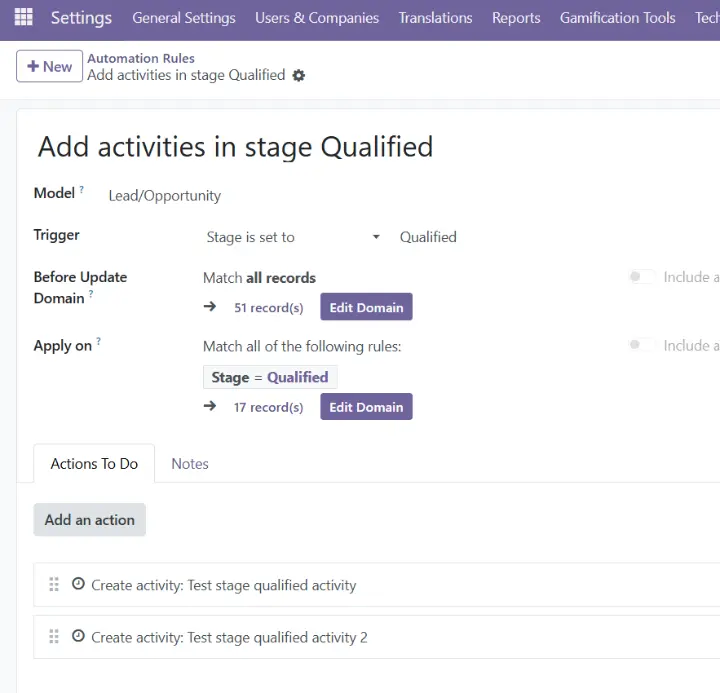
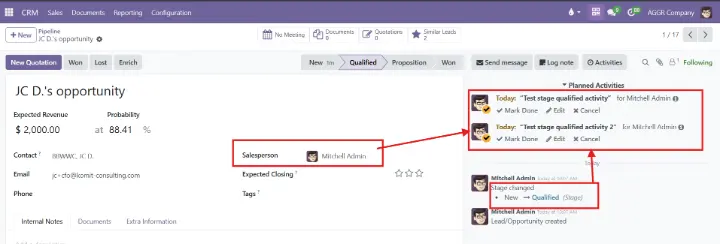
- Create an automation rule so that when the stage is set to ''Qualified" > 2 new activities are created.
- The Trigger is used to define what kind of event needs to occur for the automation rule to run. The available triggers depend on the model.
- The Before Update Domain defines the conditions a record must meet before the trigger event occurs.
- The Apply on defines the conditions a record must meet before the automation rule is executed.
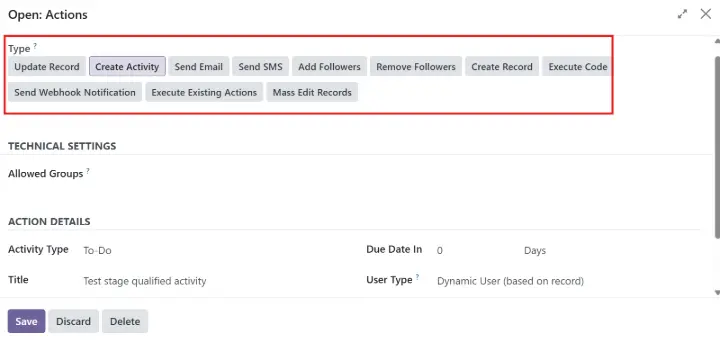
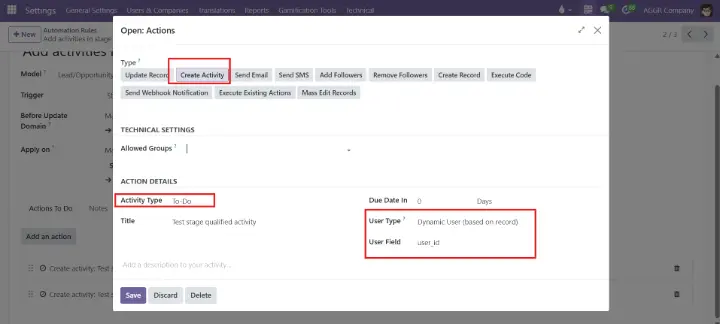
- In the tab 'Actions To Do' > Click on Add an Action > select Create Activity:
- For each type of action, Odoo will allow you to fill in some fields that are specific to that type. Since we are creating activities, you can set Activity Type, User Type, User field, etc.
- Notice that you can set the 'User Type' as 'Dynamic User' , and define which user from the Opportunity will be set as Activity assignee.
2. Check if your automation rules work.
Case 2: Configure an Automation Rule to update the stage of an Opportunity
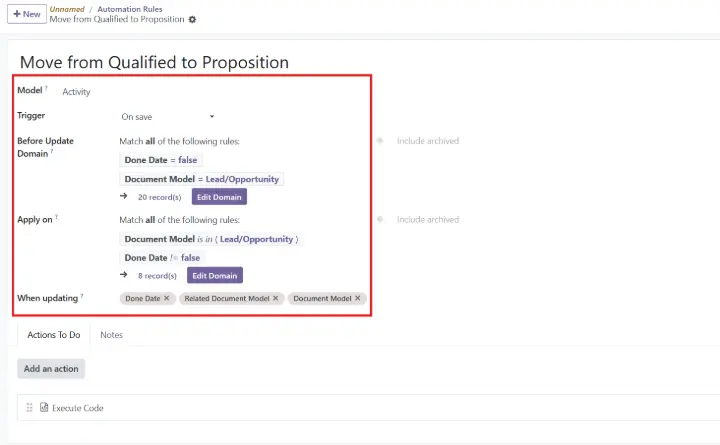
Now that all activities in stage 'Qualified' are done, we want the Opportunity to move to the stage 'Proposition' automatically.
1. Create an Automation Rule as follows:
2. Click on Add an action:
- In this case, we are using 2 models: activities [mail.activity] and Opportunities [crm.lead]. We will use the type "Execute Code" (we can help you with this).
- To get the correct code, you can request assistance from the Komit team or try using AI.

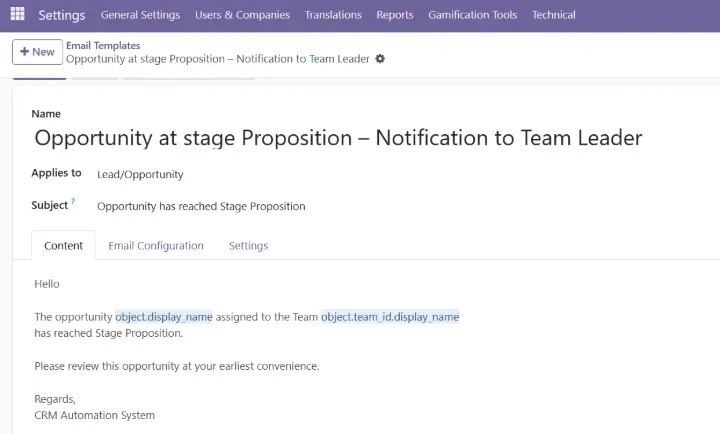
Case 3: Create Automation Rule for Mail Send
In similar logic as the steps above, you can set up as follow:
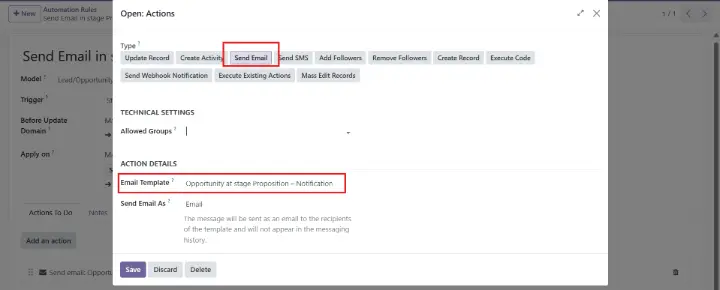
- When type = Send Email, you will need to create a Mail Template in Settings > Technical > Email > Email Templates. (you will need to activate the developer mode for this, see here).
Conclusion
Automation Rules deliver powerful, flexible automation with no/minimal coding. From sending reminders and creating tasks to handling webhooks and coding logic, users gain tremendous control over business workflows.
For more tips on automation rules, visit Odoo documentation: https://www.odoo.com/documentation/18.0/applications/studio/automated_actions.html
For more tips of using Activities, visit our blog: Track and Create reminders anywhere: Activities & Mail Activities in Odoo Use Activities efficiently
Need help configuring automation rules on Odoo? Contact us today for a consultation!
Contact us